Tuesday, September 13, 2011

Record/Download Live streaming and streaming videos(Live TV)

Multimedia has become an important part of the Internet nowadays. Consumers have realized that Internet connectivity is as important as a telephone connection and have showed willingness to invest in high bandwidth connection. This has led to a proliferation of rich multimedia websites- youtube is a prime example. Although Youtube and such sites generally offer recorded videos, live streaming is also steadily gaining momentum. Nearly all the Indian news channels provide a link to "live TV" , recently IPL also broadcast their matches live on the Internet. This can pose a problem to the average internet user though.

I was recently enjoying a hot debate aired on Times Now and decided to download it so that I could show it to my friends. Usually the channel will never provide a link to download the live news but that did not hassle me since I had a registered copy of IDM. It is when IDM failed to detect the multimedia stream that I realized that downloading live streaming is not as easy as it seems. I googled around but did not get satisfactory results. Finally I turned to Wireshark and soon it was clear that the news site used a protocol called RTSP(Real Time Streaming Protocol) to serve the content. I tried VLC media player to play the RTSP stream but it simply crashed.

Another round of googling and I found a host of software claiming to download RTSP streams. Most of them were either not able to detect the streaming video or froze. Many failed to work in Vista too. Finally I was able to find a wonderful program called Replay Media Catcher which can not only download and record RTMP streams but also HTTP live streams (like Youtube vids) and RTSP stream. It works pretty well with Vista and has no issues with the infamous Windows UAC feature. There is also a nifty feature which allows you to extract mp3 from the flv files.

After the recording has started you can close the browser since Replay Media Catcher will still download the stream. So now you do not need to sit and watch live tv since you can always record it and play it on your favorite video player, just like a movie, whenever you want to! It will download the stream and store it in a user defined folder.

NOTE: Remember to run Replay Media Catcher first and put it in 'start recording' mode before you browse to a  live streaming site, otherwise the software won't be able to detect the stream and the browser may become unresponsive.

Replay Media Catcher is not a freeware and you may want to try out its trial version or look for it on torrent network!

Interesting Links:


1. Replay Media Catcher Homepage
2. Download Replay Media Catcher
3. Times Now Live TV
4. NDTV Live TV
5. Wiki on RTSP 

Wednesday, September 7, 2011

Run free Google web proxy server

In our college someone or the other is always in a search for the ultimate Cyberoam 'bypasser'- something which is undetectable and can run all kinds of services. For all those unaware of Cyberoam, it is a network security product which (at the simplest level) can block websites and applications deemed harmful by the administration. Our administration has blocked most of the sites including rapidshare, torrent sites and many other. Obviously this can get annoying and frustrating especially when useful sites also get blocked. So far I have tried using simple web based proxy servers on the net(like hidemyass.com etc) as well as advanced VPN services like SecurityKiss and PingFu, but they have not lasted very long. The admin probably finds out by noting high network activity caused by such tunneling solutions and blocks the corresponding ip address and port rendering these services useless. Infact I have shared a few tricks/software to tunnel through Cyberoam and like network security products on this blog as well. I have provided links to those articles at the bottom.

Today I present to you yet another such software package with which you can hope to fool such firewalls. You might be surprised to know that Google provides applications which allow you to deploy proxy servers for (obviously) free! Ever heard of Google Apps Engine? It is a part of their cloud services where you can run your web applications on their infrastructure. Projects such as Mirrorrr have been developed which allow you to create a proxy server and deploy it on Google's servers. Surely no firewall in the world will block traffic to Google's trusted servers?!

Installation:

The first thing you need to do is to sign up with appengine.google.com and create an "application". The application identifier is basically the subdomain name that will host your proxy server.


Next you need to download python (preferably version 2.6). The link fo python 2.6.4: python 2.6.4 . Now download google apps engine sdk for python from code.google.com. Download the following zip file ( Google Apps Proxy Google Apps proxy ) which contains python scripts and a simple web page. The python scripts have been taken from project mirrorrr (http://code.google.com/p/mirrorrr/). This is a google apps engine application which mirrors the content of the supplied URL.

Deploying the application on the google server:


First edit the app.yaml file and edit the application field with the name of your application. Then, run the google apps engine program and click on edit-> preferences and fill in the fields. Click on File-> Add existing application. Browse to the 'proxy server settings' folder and click on OK.


Select the application and click on Deploy. You should see a python.exe cmd prompt appearing and another small console screen indicating the progress. Hopefully you will get a message that the application was successfully deployed.


Finally browse to http(s)://www.[application identifier].appspot.com. BTW Https also works! You can now freely access any site.

Obviously you cannot run any other blocked services such as a torrent client. Also not all web elements are supported and therefore some pages might not function properly. This might not be the ultimate solution to fool Cyberoam but is certainly a simple one and should not be detected by the admins quickly.

Important Links:

1. Download Google Apps Proxy files
2. Wiki on Google Apps engine
3. Google Apps homepage
4. http://www.labnol.org/internet/setup-proxy-server/12890/
5. Homepage of Cyberoam
6. Using PingFU to access blocked services
7. Hacking PingFU for unlimited access
8. Using VPN software to access blocked services

Tuesday, May 24, 2011

Reset and recover any Windows PC password using Kon Boot

A couple of previous articles talked about how Microsoft Windows platforms store user passwords and how one can access and crack them to control a PC (links provided at the bottom). Well it is a time consuming process and there is always a chance you may not be able to crack the passwords due to their complexity . It is a bit cumbersome requiring elevated privileges to extract hashes and time to crack them.

Today I present a very simple,elegant and far more powerful tool- Kon-Boot. It is one of the most destructive tools I have ever seen. It is very easy to execute and avoids the hassle of cracking hashes. 
According to the creator's homepage - "Kon-boot is piece of software which allows to change contents of a linux and Windows kernel while booting. It allows to log into a linux system as 'root' user without typing the correct password or to elevate privileges from current user to root. For Windows systems it allows to enter any password protected profile without knowledge of the password". Sounds awesome doesn't it? All you have to do is run this software, resident on a live CD or Usb, it will promptly make some changes in the kernel and voila you have hacked the PC! How cool is that! You do not need to know anything about hashes and all the complicated business associated with it. Currently Kon-Boots can exploit Windows XP,Vista,7 and flavours of Linux including Debian, Gentoo, Fedora and Ubuntu.

Steps to load Kon-Boot


I booted Kon-Boot from the iso (links to download given at the end) in VMWare. A banner displaying Kryptos will be displayed. Press a button and you will note that the screen will change. Once finished load Windows and try to access any account. If you are prompted for a password just type anything and hit enter. In my case I was not even asked for a password! ( I am using Windows XP).

If there is a problem there a few few links you might want to look up which provide information on how to burn a live CD and USB. There are some issued if you have multiple OS. I remember when I used the tool for the first time on my machine having Ubuntu and Vista, and it simply froze with a black screen. For all such problems refer to the websites given on the author homepage.

Note: Please note that the iso that you will download is not empty. Because the size of the tool is very small the size is displayed as 0kB.


Disadvantages and mitigation:


Obviously you must be able to boot Kon-Boot using a live CD/USB. A simple solution to strengthen the security is to implement BIOS password. Secondly physical access to the PC is required to carry out this attack. Needless to say, this privilege should not be granted to an unauthorized personnel.

Conclusion


Although I have shown this tool in a very negative way it has great (and noble) uses. A system administrator can always use it to create new accounts quickly without needing to remember admin passwords. In another scenario if a user forgets his password he can quickly use Kon-Boot to reset their password. Windows has introduced password-reset disk facility but this can be an alternative.
There are many such tools like Kon-Boot but this is probably the most stable and flexible of the lot.

Important Links:
Kon-Boot Homepage
More on Kon Boot and similar tools
Basics of password security and cracking
Cracking passwords using Rainbow Tables

Tuesday, May 17, 2011

Cracking Passwords using Rainbow Tables to hack and recover Windows

A previous article, cracking Windows passwords, talked about how OS passwords are stored, their security and how we can go about cracking and attacking them using bruteforce technique. This is an important aspect of OS hacking and a very notorious topic. Tools such as Ophcrack and JTR(John The Ripper) are available which can use a password file to find out all the passwords. But there is a problem with them being slow, especially for long or complex passwords (containing numbers or symbols). It is because bruteforce algorithms are always the slowest. Later the article introduced the notion of Rainbow Tables which can significantly speed up the process.

Rainbow Tables


Software tools such as JTR take a string, convert it to the hash and compare it with the hash in the supplied password file. Why not compute all these hashes and store it in a table. Basically the idea in its simplest form is to compute hashes of all the words and store them in a table. This way you do not actually need compute hashes and compare. Instead you can straightaway lookup in a table and find the plaintext corresponding to the given hash value.

So this is a rough definition of a rainbow table. Obviously it is much more complex than this. Rainbow tables can be downloaded from freerainbowtables.com or ophcrack for free. Remember ophcrack tool? You can integrate these tables with it thereby allowing you the flexibility to use either bruteforce or rainbow attack. Or you can straightaway download Ophcrack Live CD which will not require any installation and does the job automatically.

Opchcrack Live CD


A live CD/DVD contains an OS that can be booted from the disk itself. When you switch on your PC the bios looks for an OS in your hard drive, disk drive or on your network depending on the given order. The order can be changed from the bios options.

Ophcrack has created an OS which comes with the tool as well as the smallest rainbow table. Remember that XP uses LM (lan manager) hashes by default whereas Vista and later OS use NTLM hashing mechanisms. NTLM is a much more secure hashing scheme and its rainbow tables are far more bigger.

Simple Steps to load Ophcrack LiveCD


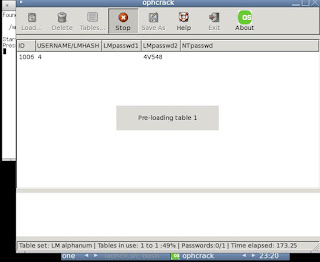
Make sure that the boot sequence has Optical Drive above the Hard Drive. Once Opchrack OS has booted ( based on Linux Slack) , it will automatically look for the SAM file in the default directory (C:\Windows\System32) and load them. You can manually search for the SAM file by browsing to /mnt/hda1/Windows/system32/)


Ophcrack automatically selects the alphanum table and starts cracking! You can find the tables in /mnt/live/ophcrack/tables.

Here is a list of passwords that I tried cracking:

NOTE: I had installed Windows XP(ie LM hashes and the XP free small table from Ophcrack) on VMWare on my 2GHz machine. Results may vary!

anadi - 80s
yellowuzumaki- 47.2s
123goldfish- 523.01s
o1m8shi4v548- 203.78s!
himynameisbobandilovelongpasswords0678- "LM hashes empty" .Remember, all passwords with length greater than 14 are stored as NT hashes.


Issues with a Rainbow table attack

A rainbow table is a classic example of time-memory tradeoff. While you can expect dramatic reduction in time consumed they are quite huge. Moreover they do not guarantee 100 percent success. There are different types of tables depending on the character set you expect the password to have. Vista tables are especially large (around 3GB) which can be annoying if you are planning to download them. Alternately you can have CD/DVD shipped to your home for approximately $50  (rainbowtables.com provides this service).

Rainbow table attack is the most reliable and fast attack to crack Windows passwords. XP is the most popular OS from Windows and is still in use even though Microsoft has disbanded its production and maintenance. Due to its tremendous speed and accuracy rainbow attack is a very big threat.

Prevention of Rainbow Attacks

Salting


Salting is a technique which introduces random string in the hashed output. This random string, called a salt, may be a username which may be appended to the password before being hashed. Mathematically something like:
f(password)=HASH(password+salt)

This thwarts the normal rainbow attack because now the hash for a given password will be something different(since right at the end a salt is added). Even if you come to know the salt you will need to re-compile the tables accordingly, which can be a tedious task. Unix based OS use salts and are shielded from this attack, sadly Windows Xp or Vista are not.

Using complex and long passwords


The only way to save your a** is if you have a strong password having a few numbers, special characters(maybe add a space or special characters like $ etc) and a long password. A password with length greater than 14 will always be stored as an NT hash.

Enabling Bios Password


Enable Bios password so that an attacker cannot modify the boot sequence. Make sure that hard drive comes above CD/DVD drive and USB drive. If your BIOS allows remove optical drive and USB drive from the boot sequence.


Important Links:


Read the basics of password security and cracking
Ophcrack homepage
Rainbowtables.com homepage
Wiki on Password Cracking
Wiki on Rainbow Tables
Wiki On Salting

Wednesday, April 20, 2011

Paros Proxy: An application layer data interceptor

This post is about using Paros Proxy, an application layer proxy server which intercepts all the application layer traffic from a specified port and allows you to modify the content going and coming form different HTTP servers. It is a very useful tool for debuggers designing dynamic websites since it can be used to understand the data being passed. It is a much better tool than Wireshark if complete information about network packets is not needed. Paros is written in java (therefore can be easily used on any OS) and is simple to use. This article will talk about how to install and run Paros with a simple configuration change. Also an example of the potential use of Paros is demonstrated.

You can download Paros from here. Please note that Java Run Time Environment needs to be installed.

Basic Usage


Go to options menu and click on local proxy, specify the address as localhost and a port preferably larger than 1024 (else you will need to start the application with admin privileges). Now point your browser http,https proxy to localhost and port 8080.


Try to browse a website and check HTTP headers in Paros. Request tab displays all the HTTP requests made by the client while response tab displays all the corresponding responses. The more interesting feature is the trap tab which can intercept and 'hold' a page before passing it to a browser. So you can trap a request or a response page and make modifications, drop it or pass it by clicking on the continue button.

You can even send your own http requests by going to tools-->manual request editor. There are some other nice features such as encoding/decoding in base64 scheme tool. (spider) and session tracking


In HTTP there is a field user-agent which contains information about client's browser. Paros modifies this header with its own name. Some sites can flag this as as a request generated by a bot and may not let you enter the site. To prevent this you can change the parameters to run Paros with.  Right click on the Paros icon and click on properties. Append '-jar paros.jar -nouseragent' to Target.


Changing port:

Paros can be set up to listen at whichever port you want it to. The corresponding settings can be found at Tools-->Options-->Local Proxy


Finally here is a small video illustrating the potential use of Paros.


Important Links:
1. Download Paros Proxy
2. Download Java Runtime Environment (JRE)

Monday, February 28, 2011

Computer Foresnic tool: MDD & vulnerability in Putty

MDD also known as Memory Dump by ManTech is a forensic software tool used to take a snapshot or an image of a computer's memory. Nowadays with increasing loopholes in a system, software memory leaks have become common, programmers forget to deallocate dynamic memory or ensure that sensitive data is not left behind when a software exists. Since movement of data to and fro a regular memory is very high it becomes very difficult to store and map an accurate description of it. Fortunately MDD is a tool which is able to create a somewhat stable image. Tools such as MDD have very interesting applications.You will be amazed to see the amount of information which can be extracted from a memory dump. 

Installing and running MDD:


You can download MDD from this link. To run MDD open cmd in Windows and using administrator privileges and type the command
mdd.exe -o
Please make sure that your drive has sufficient drive space. Right now I will treat this 'dump' as a normal text file and therefore to read the output file you need a special kind of a text editor since normal text editors such as notepad/++ simply refuse to open such large files. I searched on the net and found LTF(large text file) viewer 5.2 which claims to open huge files within seconds. The memory dump, you will find, is full of interesting stuff. Although most of the file will appear as gibberish words there will be lines in clear ascii and you will be amazed to see the contents. I have provided a screenshot of my PCs memory dump.

Unfortunately searching is very slow in LTF and therefore I had to resort to good ol' cmd and command line interface to search. Use the find utility to search for keywords.

Usage:


find "[string]" [filename]

You will be amazed to see the amount of information available in the output file..
Hint: Try searching for some interesting words like password, username or your name.


Infact Putty has a small vulnerability which can be exploited using this tool. More about it in some future article.


Important Links:

Download MDD

Sunday, January 2, 2011

CCNA tutorial: Router On A stick

A couple of previous posts were about


 A special topology known as Router On a Stick was also mentioned(it is an interesting topic taught in Cisco's CCNA curriculum). In certain situations VLAN prove to be too restrictive since they disallow inter-VLAN communication ( to understand why see VLAN Intro PART 2). To resolve this problem a router is set up and configured to allow such communication. Usually the topology ends up looking something like this:


router on a stick


Note:
switch0's (2960 model) fa0/1 is connected to router's fa0/0 (2811) 
PC-0-5 are connected to fa0/2 and so on 

Router configuration:

For each VLAN id there will be a corresponding sub-interface and an ip address assigned to it. Explanation of a couple of key commands:

int fa0/0.1  //create a subinterface with id 1
encapsulation dot1Q 2 //dot1q refers to IEEE 802.1Q which documents VLAN
//standards. 
//This command sets VLAN tagging and all hosts in VLAN id 2
//will be communicate with this interface 

A sub-interface:


In cisco devices a sub-interface is a division of the physical interface into many logical,independent interfaces.So a physical port, say fa0/0 may be divided into fa0/0 , fa0/0.1 ,fa0/0.2 -3 separate interfaces belonging to the same physical interface but logically acting independently. 
Pinging PC1 from PC0 will not work initially. What you need to do is to create subinterfaces and enable 802.1Q encapsulation/tagging. Now the router will be able to understand the tagged packets. 

Additionally assign a unique subnetwork to each VLAN group and the router's subinterface.In the following code note that VLAN id 1 has been assigned 10.0.0.0/8 subnetwork, id 2 with 20.0.0.0/8 and VLAN id 3 with 30.0.0.0/8 .Router's fa0/0 interface has 10.0.0.1/8 , fa0/0.1 20.0.0.1/8 and fa0/0.3 with 30.0.0.1/8. 

All the hosts need to be assigned a gateway address. Remember that the gateway address and host address always belong to the same (sub)network. Keeping this in mind: 

PC0,PC3,PC5 will have their gateway address as 10.0.0.1/8
PC1 will have 20.0.0.1/8
and PC2 and PC4 will have 30.0.0.1/8

Interestingly 30.0.0.1 interface has been configured to accept VLAN id- 3 packets which is correct since all the nodes in VLAn id -3 will have their gateway address as 30.0.0.1/8.

Finally try to ping PC1 from PC0. If pings are successful you have been able to do inter-VLAN communication. If not try the realtime mode to see where packets are being dropped. The most common mistakes include not setting the encapsulation type on the router, binding subinterface with the wrong vlan id. Remember that by default VLAN id 1 is called the native VLAN and these packets are NEVER tagged. That is the reason why you DO NOT need to set encapsulation/tagging on fao/0 interface.


//switch:
en
conf t
vlan 2
name account
exit
vlan 3
name admin
exit

int fa0/1
switchport mode trunk //sets this port as trunking port
exit

int fa0/3
switchport access vlan 2 //this port belongs to VLAN id 2
exit
int range fa0/4,fa0/6
switchport access vlan 3
exit
end //jump from config mode to privileged mode
copy running-config startup-config //save all the settings

//Router:

enable
configure terminal
int fa0/0
ip address 10.0.0.1 255.0.0.0
no shutdown  //enable interface
int fa0/0.1 //enable logical subinterface fa0/0 id 1
encapsulation dot1Q 2 //Enables router to 'read' vlan tagged packets.
ip address 20.0.0.1 255.0.0.0
int fa0/0.3 
encapsulation dot1Q 3
ip address 30.0.0.1 255.0.0.0
end

copy running-config startup-config